
Use Visual Studio Code to develop ROS projects
After installing ROS on the Windows 10 / WSL2 laptop according to my earlier posted blog which you can find here we’re ready to develop a new Catkin project!
But wait, how do I develop on the Ubuntu Subsystem which is installed? I’ve found a useful post on the Visual Studio Code website which I’ve followed to develop on my Windows and execute on the Ubuntu Subsystem.
I’m talking about the following url: https://code.visualstudio.com/docs/remote/wsl.
Now we’re ready to develop some ROS Nodes and work with cool robots and stuff. In another post I’ve been talking about a Nvidia Jetson Nano Developer Kit which I assembled in a metal case. Now it’s time for the software part.
As Nvidia has it’s own SDK for Vision and Robotics, i’m more focusing on working with ROS Melodic right now.
Why ROS Melodic?
The Nvidia Jetson image is based on Ubuntu 18.04 LTS and Noetic has no support for Ubuntu 20.04 LTS. That’s also why I’ve chosen the Ubuntu 18.04 LTS app to install on my Windows 10 system and use the ROS distribution Melodic which is supported by Ubuntu 18.04 LTS.
Start Visual Studio Code from the Ubuntu App
Let’s first create a catkin workspace through the terminal of the Ubuntu App and initialise the workspace. Let’s start Visual Studio Code after that in the current directory by typing the following command in the terminal:
code .
This will open a Visual Studio Code IDE on your Windows but has a connection made to the subsystem Ubuntu App. The reason why I love it is that this also makes it possible to develop on your laptop and run it on your external system which in this case could also be the Nvidia Jetson Nano.
This is because the Windows Subsystem Linux can also be seen as an external host.
Let’s start with our first ROS Node
Step 1: Create a catkin workspace
Because the Ubuntu App still uses the hardware of the laptop i’m aiming to use the webcam of the laptop for our first ROS project.
Let’s create and initialise a catkin workspace where we can create our ROS packages which may evolve to our ROS Nodes. A package can become a ROS Node but doesn’t necassarily have to. A package can also function as a dependency for another package. To create a workspace we’ll need to execute the following commands in the Ubuntu App terminal:
mkdir -p ~/catkin_ws/src
cd ~/catkin_ws/
catkin_make
Ofcourse you’re free to use any location for the workspace you think is suited for the job.
A workspace is for a robot project which means one workspace per robot project. Also good to know that only one catkin workspace can be activated in the terminal because after you created a catkin workspace you’ll need to source the setup.bash file in the terminal. In case you’ll try to source multiple workspaces then the last workspace you’ve sourced is activated.
So let’s source and activate the newly created workspace by executing the following command:
source devel/setup.bash
Ofcourse you can source your workspace everytime you’re opening a terminal but you can also add this to you ~/.bashrc file. Now the next step is to run the Visual Studio Code editor from the workspace location by entering the following command in the Ubuntu App terminal:
code .
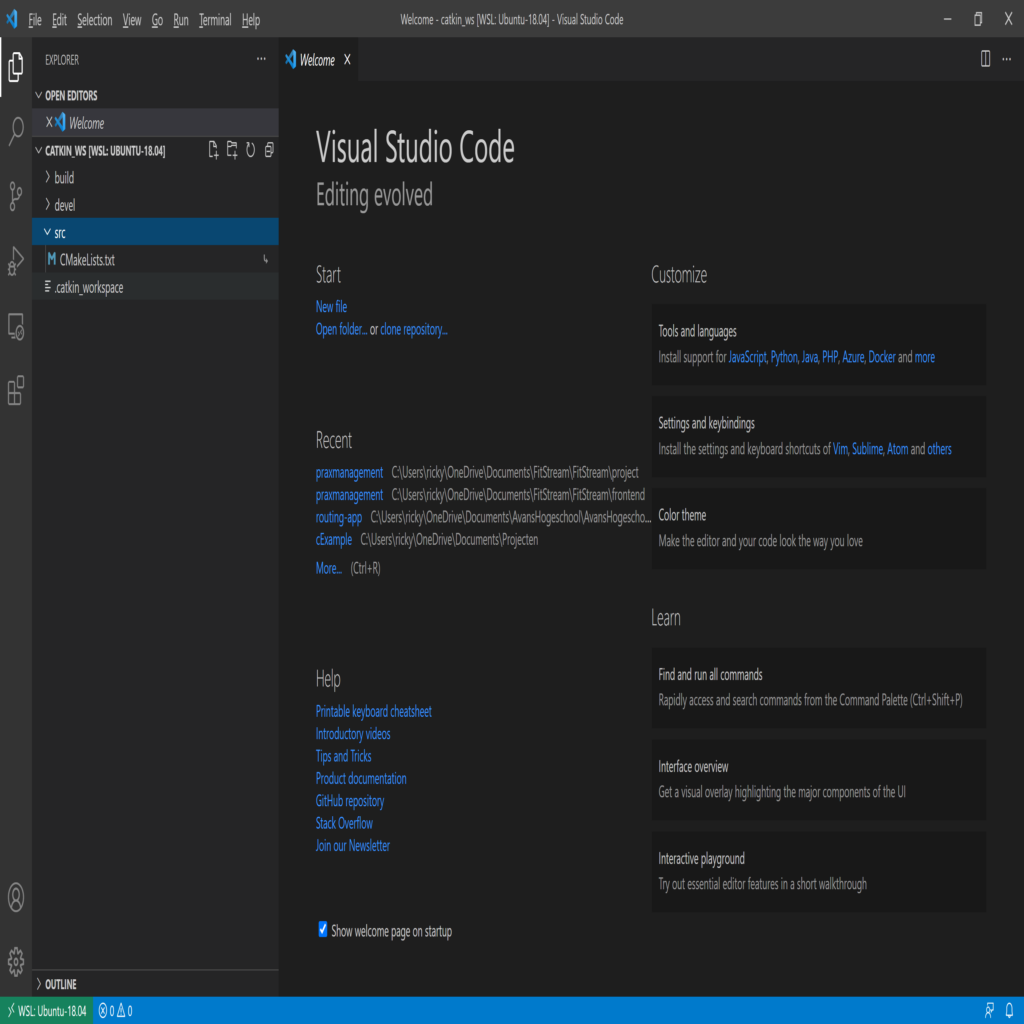
Now the workspace folder has opened in a Visual Studio Code Editor.
Great news! You’ve just created the workspace for your own ROS project!
Step 2: Create your own catkin package
A workspace is a must-have for every ROS project and within that workspace you can build yourself a catkin project which could also be called a package. One ROS node can consist of several packages so you can see a ROS node like a single responsibility item like navigation or motorcontrol.
Back to our terminal and create our first package, let’s name it “hello world” respectively. Make sure you’re in the src folder of your workspace! With the creation of a package we’re able to provide the dependencies of our package, which in this case are:
- std_msgs – standard messages
- rospy – ros python support
- roscpp – ros C++ support
catkin_create_pkg hello_world std_msgs rospy roscpp
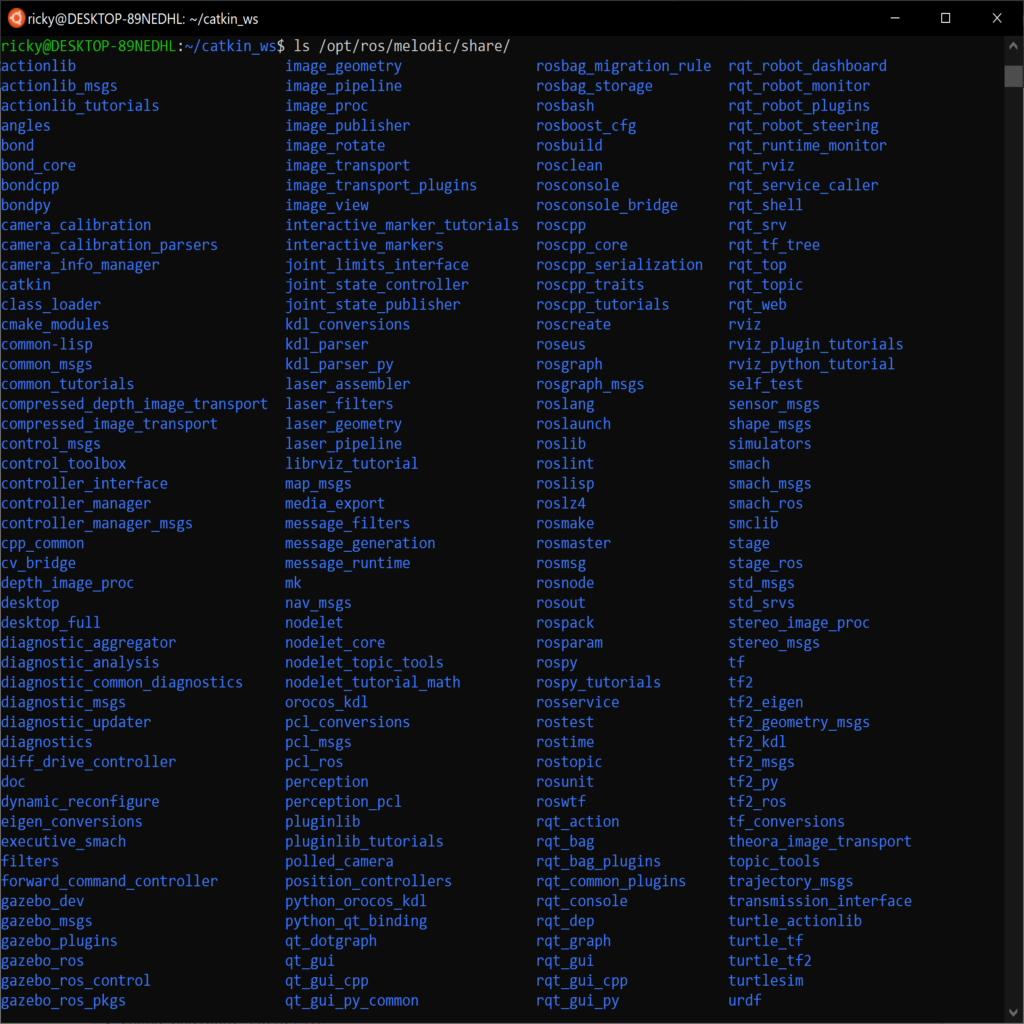
Dependencies of your package are also packages. In this case the packages are from the ros library which path is stored in the ROS_PACKAGE_PATH environment variable. In my case it’s path within my Ubuntu 18.04 LTS app is: /opt/ros/melodic/share.
The succesful output as expected should be as shown below.

As the output suggests to change the package.xml accordingly you can provide your information about the package and/or author accordingly.
If so, open the package.xml with an editor of your choice and change the values accordingly, save the file and close it. More information about the structure of the package.xml can be found here: http://wiki.ros.org/catkin/package.xml .
Let’s first build our workspace with catkin_make. The catkin_make command has some convenience built-in. From the catkin_workspace root it will build all folders, meaning all your catkin projects!
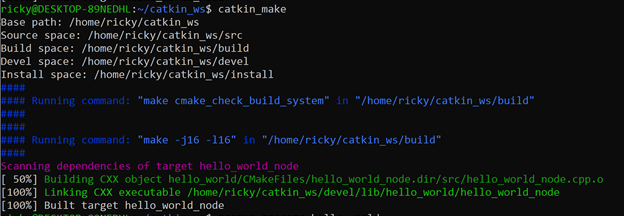
So head up to the root of the catkin_workspace and run catkin_make!
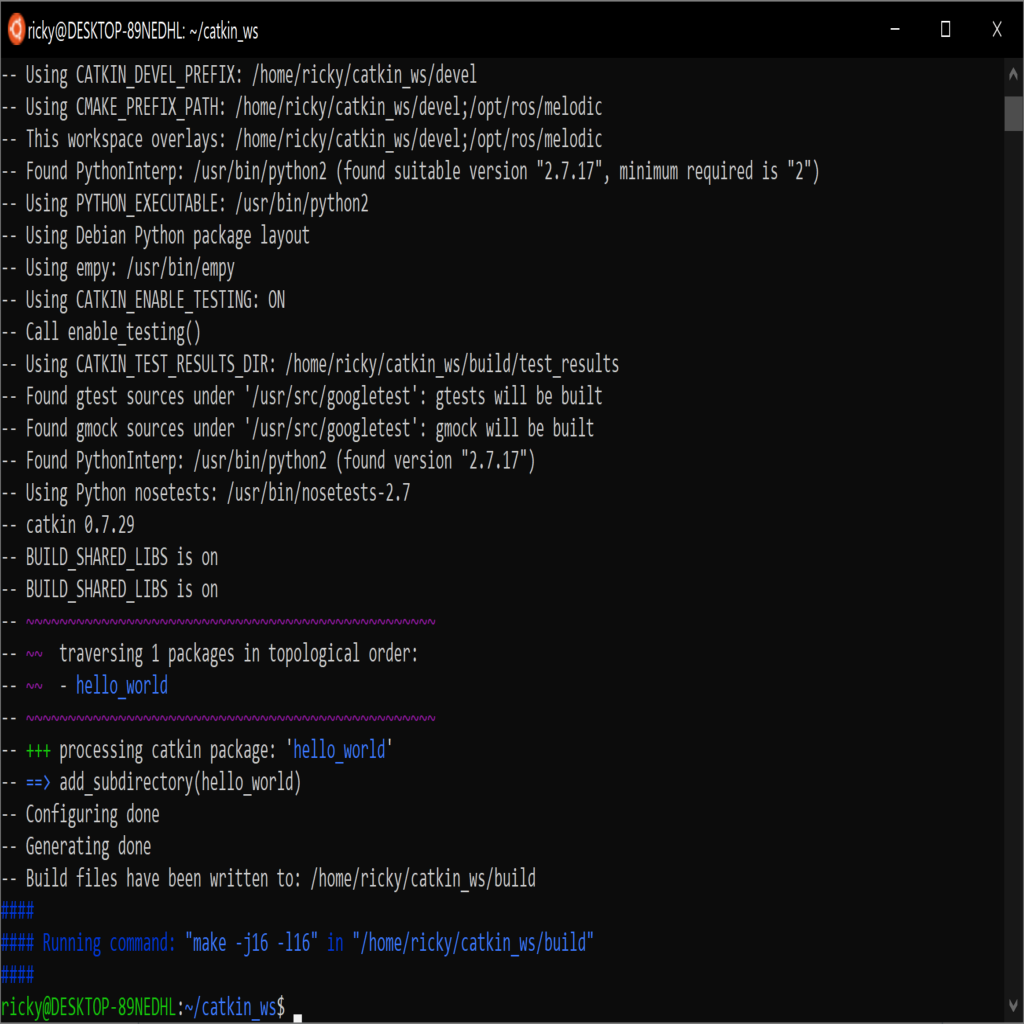
It worked! It successfully build our helllo_world catkin_package!
No wonder actually, there is still no code of our own but we’ll get back to that later. If you list the contents of the devel folder in your catkin_workspace you’ll notice that it has the same characteristics as the /opt/ros/$ROS_DISTRO.
If you list the contents of your ROS package path a large list of catkin packages appear to exist which are all part of the ROS library.
When you’ll look into your workspace and execute the list command in the devel folder, notice that only your package exists there!

If you haven’t done already and skipped some instructions ;-). To add our workspace with our developed catkin packages (projects) to the ROS environment we’ll need to source the catkin_workspace/devel/setup.bash file again.

You’ll notice that if you echo the ROS_PACKAGE_PATH the path to your catkin_workspace has been added.

Well done, your package has been created!
Step 3: Create some awesome C++ code!
When you’ve got the Visual Studio Code editor open, go to your Visual Studio Code editor. Otherwise go to the Ubuntu app and navigate to the root of your workspace which could be ~/catkin_ws/ and start Visual Studio Code by typing ‘code .‘ without the quotes.
If done correctly the Visual Studio Code editor is open and will look something like the following.
Also notice that on the lower left corner the connection with the Ubuntu app through WSL is present.

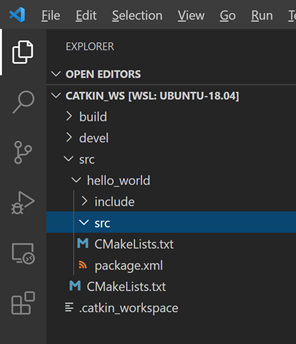
Let’s create our first C++ file, right click on the src folder of the hello_world package and choose New File.
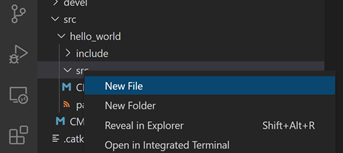
Let’s name it hello_world_node.cpp like the package name and open the file.
Let’s be sure to include the ros code libraries to be able to use the ROS funtionality. This can be done by the inclusion of the header file ros/ros.h.
#include <ros/ros.h>
All coding languages have a starting point for their code, this isn’t different. Define the main function as the beginning of your possible node.
int main( int argc, char **argv) { ... }
Ofcourse we need fill in the dots here. To initialize the node which contacts the ROS master and registers the node in the system we call the ros init command.
ros::init(argc, argv, "hello_world");
And I’ve added a debug statement with Hello World.
ROS_DEBUG(“Hello %s”, “World”);
This will bring the whole code within the hello_world_node.cpp file to:
#include <ros/ros.h>
int main(int argc, char **argv) {
    ros::init(argc, argv, "hello_world");
    ROS_DEBUG("Hello %s", "World");
}
Eventually we would need to run catkin_make again. This will return without any errors if done correctly. However if we want the hello_world_node to be an executable ROS node we’ll need to make some alterations in the CMakeLists.txt within the hello_world package folder.
You need to uncomment three options here to make this package turn into a ROS node:
- # add_compile_options(-std=c++11)
- # add_executable(${PROJECT_NAME}_node src/hello_world_node.cpp)
- # target_link_libraries(${PROJECT_NAME}_node
# ${catkin_LIBRARIES}
#)
You’ll need to remove the ‘#’ sign to uncomment the lines.
HINT: If for example the target_link_libraries task isn’t uncommented the catkin_make command will return some errors because the linking process fails and the linker can’t find the references towards the ROS library.
Run catkin_make again, if everything runs correctly no errors are shown and the linking process successfully completes.
Now we’re ready for the innovation of the century, let’s run this node!
rosrun hello_world hello_world_node
Let me explain something about this command, first is the packagename, second parameter is the executable node to run. Because we commented out some commands in the CMakeLists.txt file we created an executable node of the hello_world_node.cpp code.
If you run the above stated rosrun command the following output will show.

If that’s not the case, no worries! A small adjustment can provide you the outcome as pictured above. But why will this not work? Because the default setting is apparantly set on a higher logging level like error. In a list from low to a higher logging level:
- DEBUG
- INFO
- WARN
- ERROR
- FATAL
- NONE ( No logging)
As you might have searched on google there are a lot of options and the most common option is the config file with the log4j setting configured on DEBUG. This is the more solid and professional way to integrate this kind op options on your project. However this is a quick setup so i’ll take the quick way and set the logging level programmatically.
if( ros::console::set_logger_level(ROSCONSOLE_DEFAULT_NAME, ros::console::levels::Debug) ) {
   ros::console::notifyLoggerLevelsChanged();
}
Note that you’ll need to put this above your debug statement as the sequential order of execution is something to keep in mind.
The code with setting the logging level to Debug level comes down to:
#include <ros/ros.h>
int main(int argc, char **argv) {
    ros::init(argc, argv, "hello_world");
if (ros::console::set_logger_level(ROSCONSOLE_DEFAULT_NAME, ros::console::levels::Debug)) {
ros::console::notifyLoggerLevelsChanged();
}
ROS_DEBUG("Hello %s", "World");
}
Step 4: Show me the log files
If you want to see the logging, you can go to the .ros folder which resides in the home folder. The quick route is ~/.ros . There’s a folder log and a subfolder latest. The latest folder is actually a symlink but i’ve seen the code it generates and that’s hard to remember so I suggest using latest.
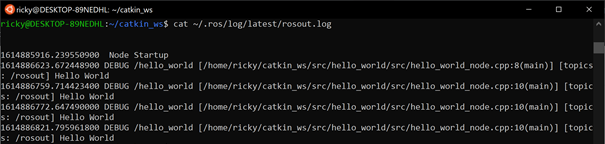
To see the output of the node print the output of the rosout.log to the screen.
cat ~/.ros/log/latest/rosout.log
This will show something like this.
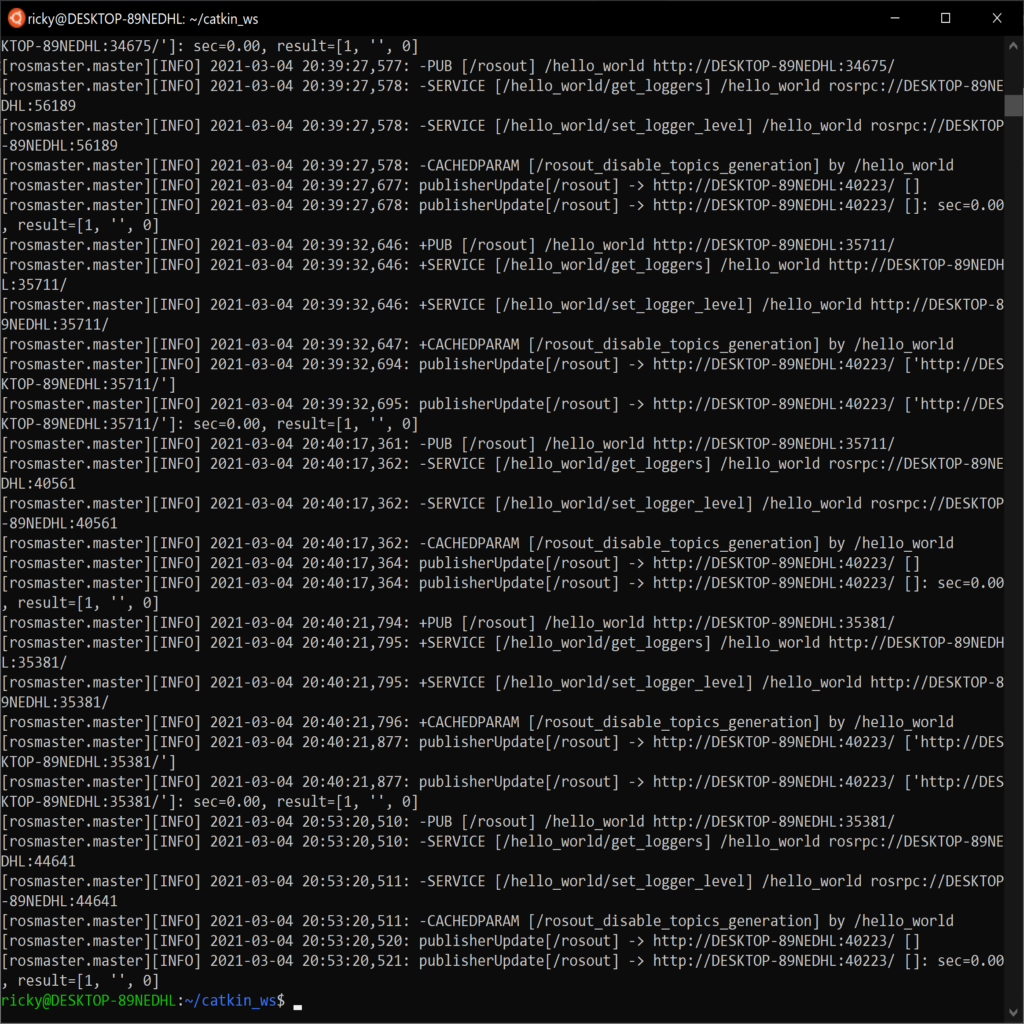
This is were the output of the nodes are collected as logging. But ofcourse you’re also interested in the logging of the master node. This is a similar command only a different file, rosmaster.log.
cat ~/.ros/log/latest/master.log
This output is a bit different because the logging of the publish/subsribe events are logged here. The master node is ofcourse our man in the middle which manages the nodes.
Now you know how you to create a small ROS project with a
- Creating, initializing and building a catkin_workspace
- Creating a catkin_package
- Creating and running a simplistic ROS node
- See the contents of the logging output of the nodes and master.
Happy coding!
After installation, RoboWare Studio automatically detect and load ROS environment without additional configuration. There is an open-source VSCode extension available for ROS development which you can install using the command
This was very useful! Thank you for taking the time to write this up.