
Install ROS on Windows 10 with WSL2
I want to write code and be able to run my Windows laptop without a virtual machine for specific Ubuntu installation or dual boot. With WSL from windows it should be possible. Well it is! You need the following steps:
- Configure WSL2
- Install Ubuntu App
- Pass the GUI from the Ubuntu app through an x-window-server application for Windows
- Install ROS
Enabling WSL
I’ve enabled WSL through the powershell commands:
dism.exe /online /enable-feature /featurename:Microsoft-Windows-Subsystem-Linux /all /norestart
dism.exe /online /enable-feature /featurename:VirtualMachinePlatform /all /norestart
And set the default version of wsl to 2.
wsl --set-default-version 2
You could get the message that you will need to update, please do so and reboot.
Install the Ubuntu 18.04 LTS app from the Microsoft Store
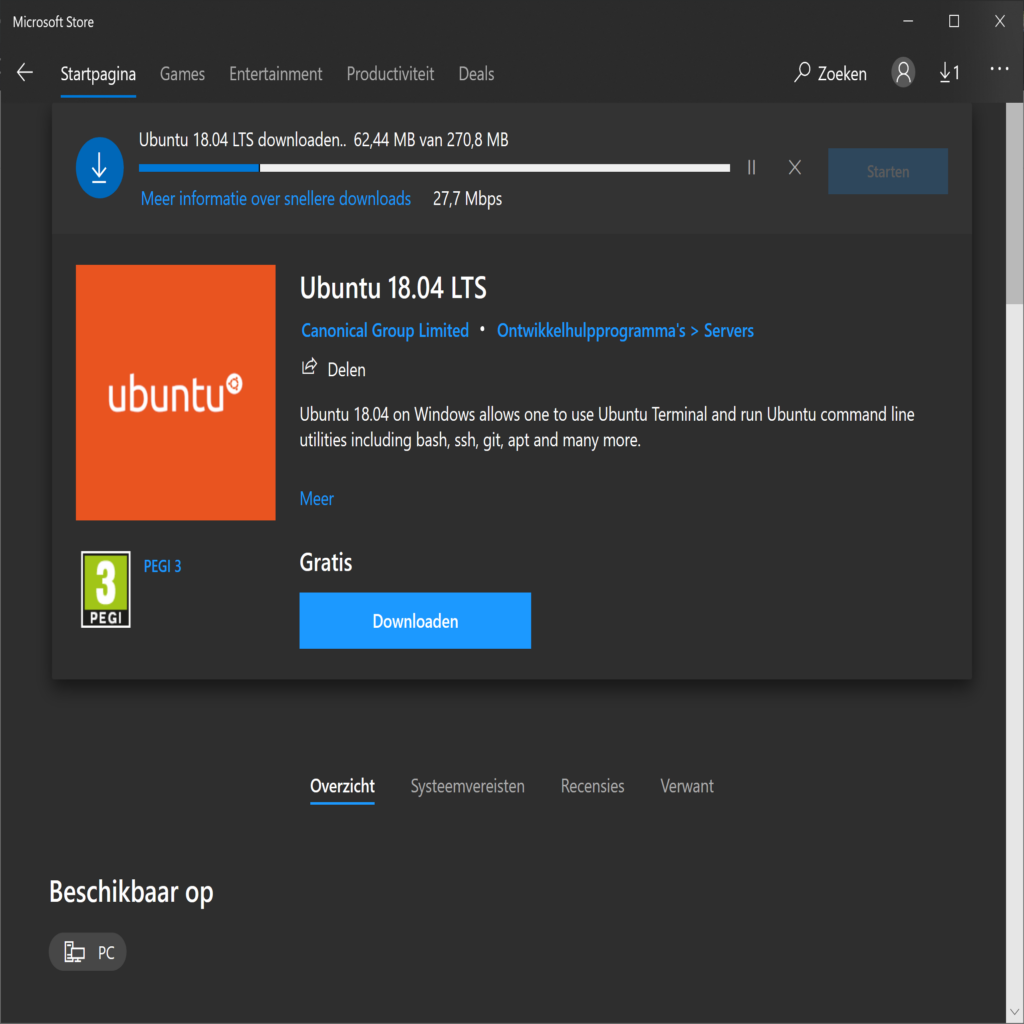
To get more out of WSL2 on Windows 10 and ROS we’ll need to download Ubuntu through the windows store. You can type in ‘Linux’ or ‘Ubuntu’. Below a printscreen how it looks in the windows store, and besides all that it’s free.
If you click on the app without any version mentioning, you’ll get the latest LTS version. In this case it’s Ubuntu 20.04 LTS. But I’ll need ROS melodic because my Jetson Nano has Ubuntu 18.04 LTS installed on it. So I’ve clicked on the 18.04 LTS ubuntu app and installed it.
After it’s installed, click start. The first run it can take some time depending on your laptop performance. The first run it will ask you to set a username and password. These doesn’t need to be matched with the windows username. When configured the terminal is showing and waiting for your command!
You just installed a whole Ubuntu version on your laptop! Awesome right?!
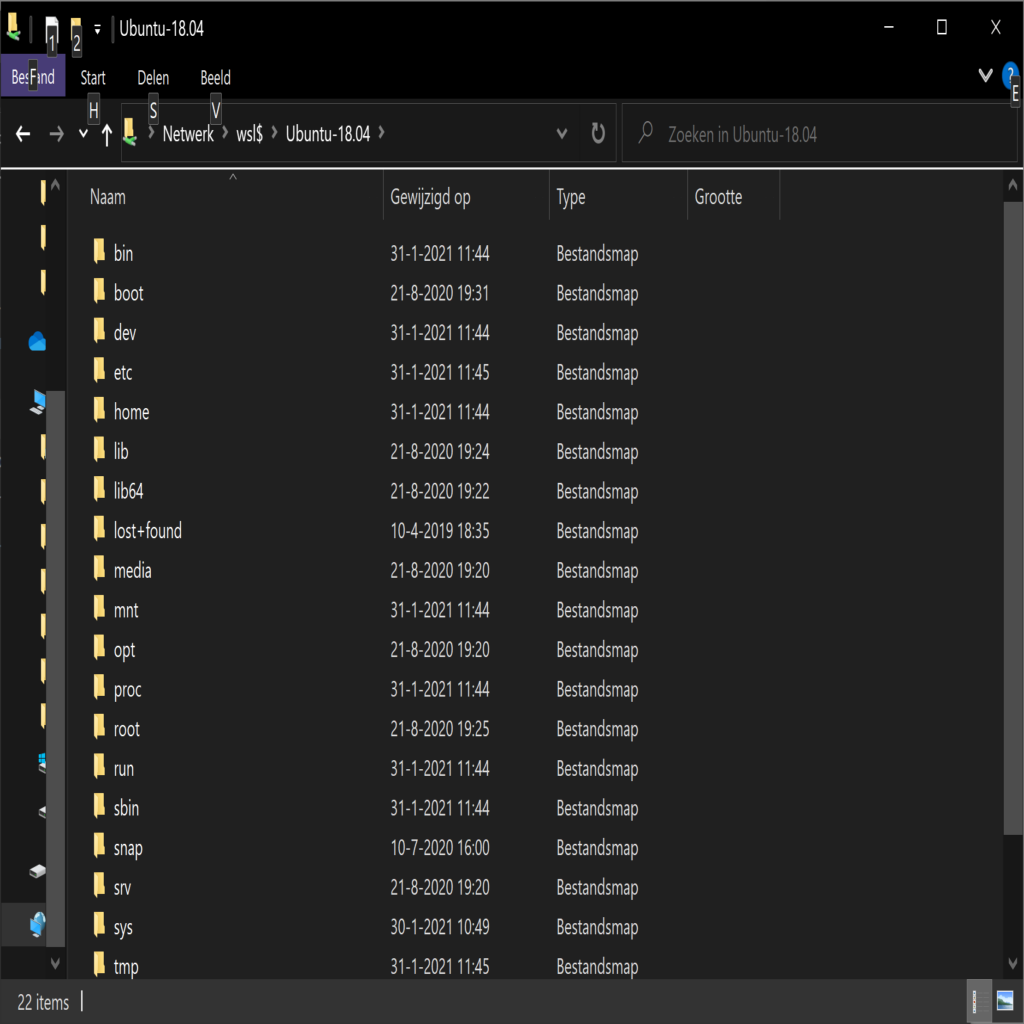
The filesystem is available through a network share, \\wsl$\Ubuntu-18.04 .
Pretty cool!
Forwarding the GUI or x-server
I’ve installed VcXsrv from here: https://sourceforge.net/projects/vcxsrv/. This is a project which enables a Windows user to run a GUI application designed for the X Window System of Linux. More information about this project can be found here.
Especially with the WSL of Windows 10 it enables an user to install an GUI application in the Ubuntu app and run it through the VcXsrv to the Windows system. This way you can run Linux GUI applications on your Windows 10 laptop.
After installation I started the XLaunch app which inmediately asks some configuration values to setup.
The first is the display settings, which is set on -1 by default. This is fine for us so you can click on next.
The next step is how to start clients, also the default is fine and you can click on next.
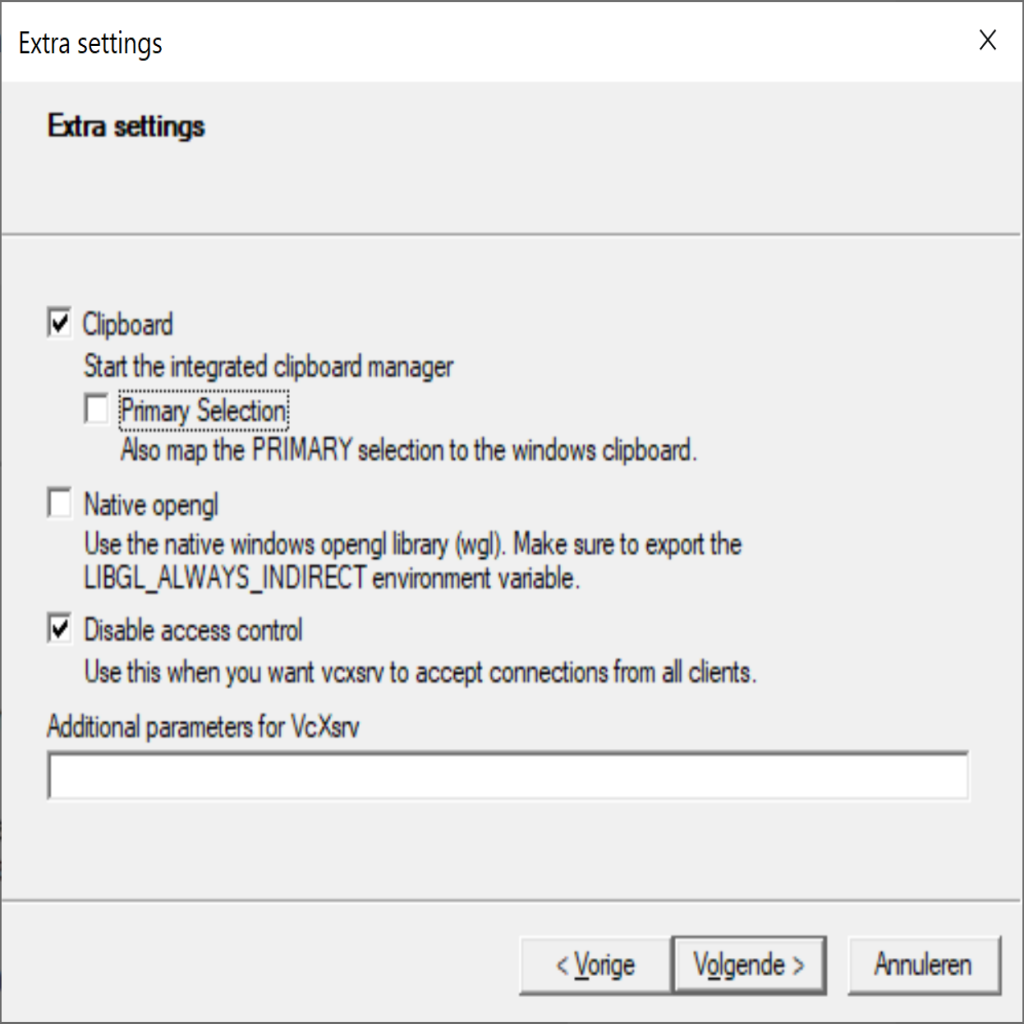
Now we need to adjust some default settings, we need to uncheck the box for Native OpenGL and check the box for Disable access control, note that this is the most unsecure option! Click next. For the non-dutch people who will see the picture below, Volgende means Next.
After this step we can create a shortcut for the next launch with the same settings. This can be done by clicking on Save Configuration. Which saves a config file which we can use to start VcXsrv.
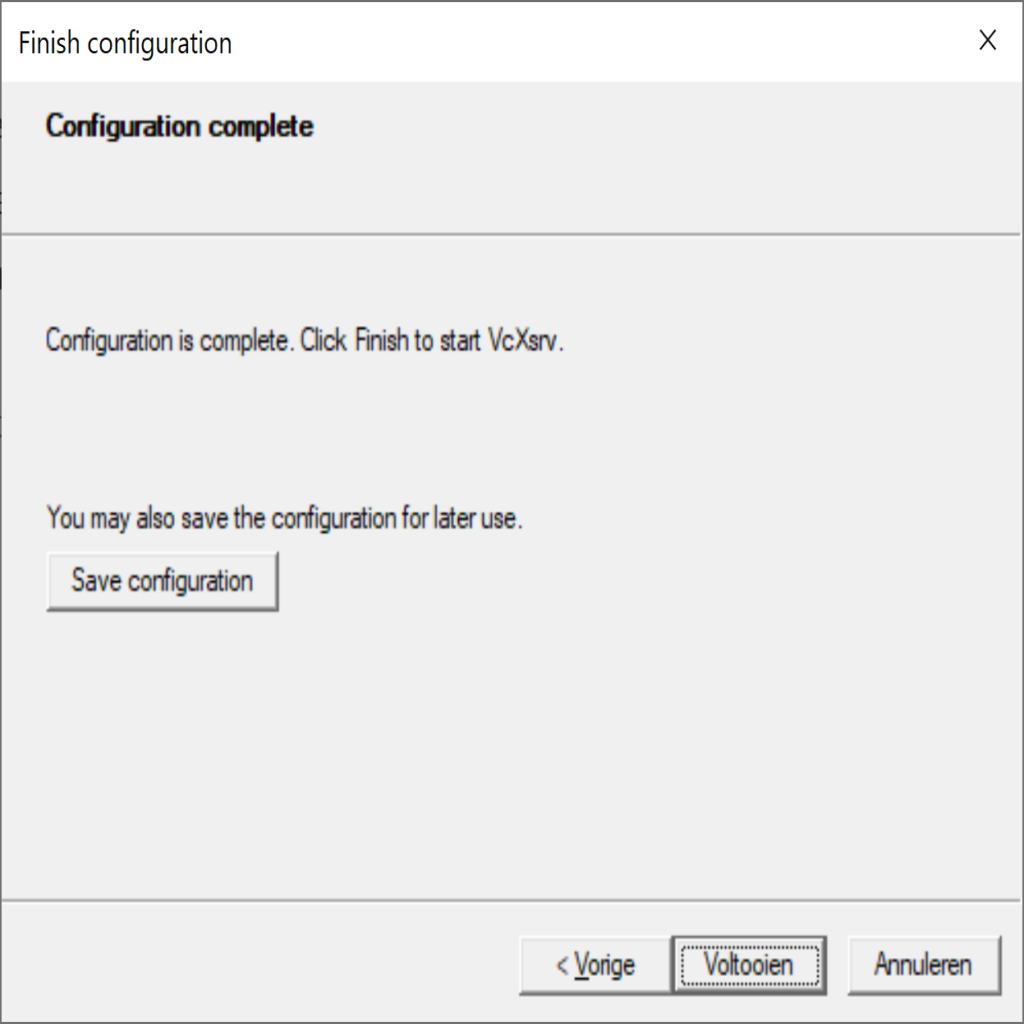
It will save a config.xlaunch file to a destination you’ll point to. Once you’ll click Finish or in dutch like stated in the picture above it’s Voltooien.
Afterwards you’ll see a icon of XLaunch in your icon tray which means it’s active and running.

Now the x window system support is installed and the xlaunch server is active it’s time to connect the dots. The Ubuntu app doesn’t know the Windows host, so we’ll need to create a connection from the Ubuntu app to the Windows laptop.
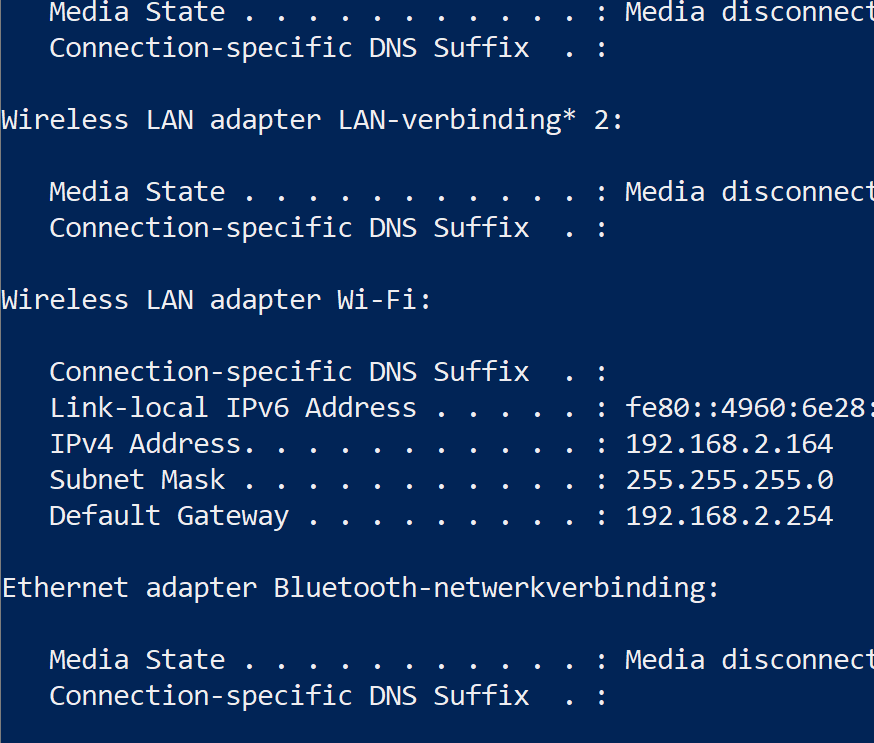
Therefore we need the ip-address of the Windows machine which can be aquired by opening a commandpromt or powershell window and type the following command: ipconfig.
The output will vary but for reference it shows something like the following picture.
This can be done by opening the Ubuntu app which leads you to the terminal. Run the following command:
echo 'export DISPLAY={your_ip_address}:0.0' >> ~/.bashrc
Replace the placeholder with your ip-address and you should be good. Please note that if you’re running this on a laptop the ip-address may vary per wifi hotspot and you’ll need to adjust it.
Also note that the command adds the command to the ~/.bashrc file which is executed for every terminal session. This way you don’t need to export the value every single time you need it.
Before you can continue in this terminal session you’ll need to load the changes. With the source command you can do that.
source ~/.bashrc
To check if everything is the way we want it, you’ll need to run the following commands. First do a update and then install some small x window linux applications.
sudo apt update
sudo apt install x11-apps
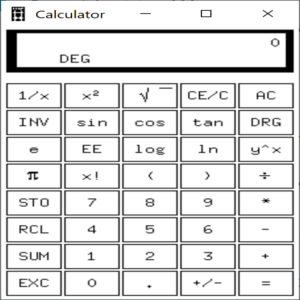
After the installation is done, just run xcalc and see if it works.
xcalc
It should look a bit like this:
To start the application and put the process in a background process, just run the command with an & after it. This way your app runs in a background process while your terminal is still available for commands.
xcalc &
Installing ROS
Probably the most excited thing about this blog, the installing of the Robot Operating System. Ofcourse the ROS team already has a lot of information and guides on their website, http://wiki.ros.org/melodic/Installation/Ubuntu. All credits are for them.
So in our WSL system, our Ubuntu App, we’ll need to add a repository by adding it to our source list. This way we can install ROS from that source.
sudo sh -c 'echo "deb http://packages.ros.org/ros/ubuntu $(lsb_release -sc) main" > /etc/apt/sources.list.d/ros-latest.list'
And this repository requires a key which we need to install.
sudo apt-key adv --keyserver 'hkp://keyserver.ubuntu.com:80' --recv-key C1CF6E31E6BADE8868B172B4F42ED6FBAB17C654
If the above key server doesn’t work try the following:
sudo apt-key adv --keyserver 'hkp://pgp.mit.edu:80' --recv-key C1CF6E31E6BADE8868B172B4F42ED6FBAB17C654
After you’re done with this step we can update our repositories.
sudo apt update
After this you’re ready to install ROS, however there are several flavors. Or metapackages as we call them.
- desktop-full : This is the full package which includes simulators, perception, navigation, rqt, and ofcourse rviz.
- desktop : Everything from desktop-full but misses the simulators, navigators, and perception
- ros-base : barebone ros installation
- and other individual packages
To search individual ros-melodic packages you can use the following command:
apt search ros-melodicBut we’re really interested at working at full speed with ROS so we’ll choose the desktop-full package.
sudo apt install ros-melodic-desktop-full
Which results in a beautiful installation of a great piece of software.
If you want noetic installed you should use Ubuntu 20.04 LTS app from the Microsoft store.
To fully use ROS in the terminal you’ll need to source the setup.bash of the ros installation. You really don’t want to do this every single time a terminal opens so we’ll use the following command in the Ubuntu app.
echo "source /opt/ros/melodic/setup.bash" >> ~/.bashrc
Don’t forget to source the .bashrc file in the current terminal to use the ros installation directly.
source ~/.bashrc
Now you’ve got everything to run ROS. You basically you’ve got a runtime and the next step is the development environment.
This is the moment you’ll also need to choose a programming language. I prefer C++ but i’ll need the following packages as they facilitate the download and management of ROS packages.
sudo apt install python-rosdep python-rosinstall python-rosinstall-generator python-wstool build-essential
After you’ve installed all of the needed tools you’re ready to initialize ROS. You can do that by the rosdep init command followed by the rosdep update command to update the ROS dependencies.
sudo rosdep initrosdep update
The rosdep init command will also show a message that it’s recommended to run rosdep update.
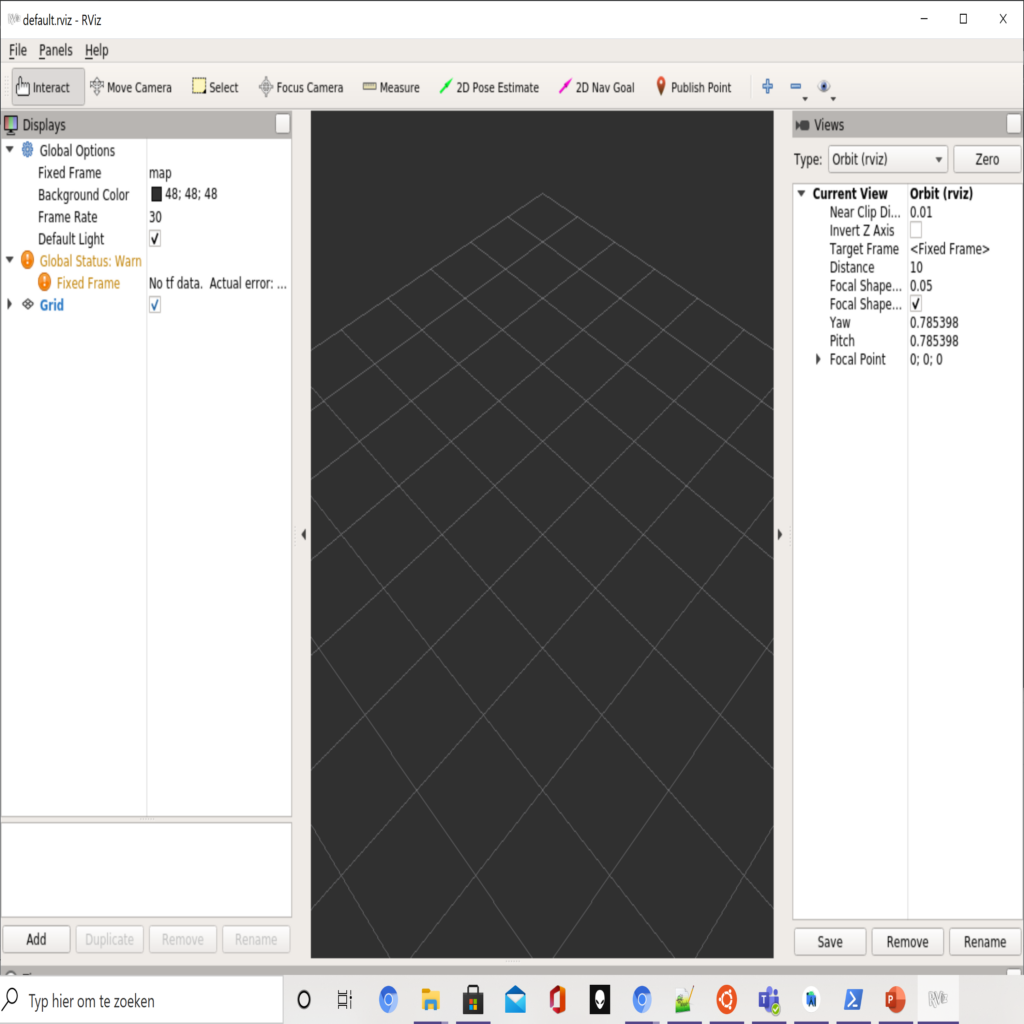
To run roscore and run rviz you’ll just start them and if everything is setup correctly rviz will show.
roscore & rosrun rviz rviz
After you’ve ran roscore once, the rosmaster has started so if you’ve closed rviz it isn’t needed to start roscore again. This would result in an error stating rosmaster is already online.
If Rviz doesn’t start or you’ve got any issues please try to put the following statement into the ~/.bashrc file.
echo 'export LIBGL_ALWAYS_INDIRECT=0' >> ~/.bashrc
And run source ~/.bashrc to apply the changes directly to the currently running terminal session.
Rviz eventually would look something like the following picture if everything works out.
ROS is successfully installed and you’re ready to bring robots to the next level! Happy coding!