
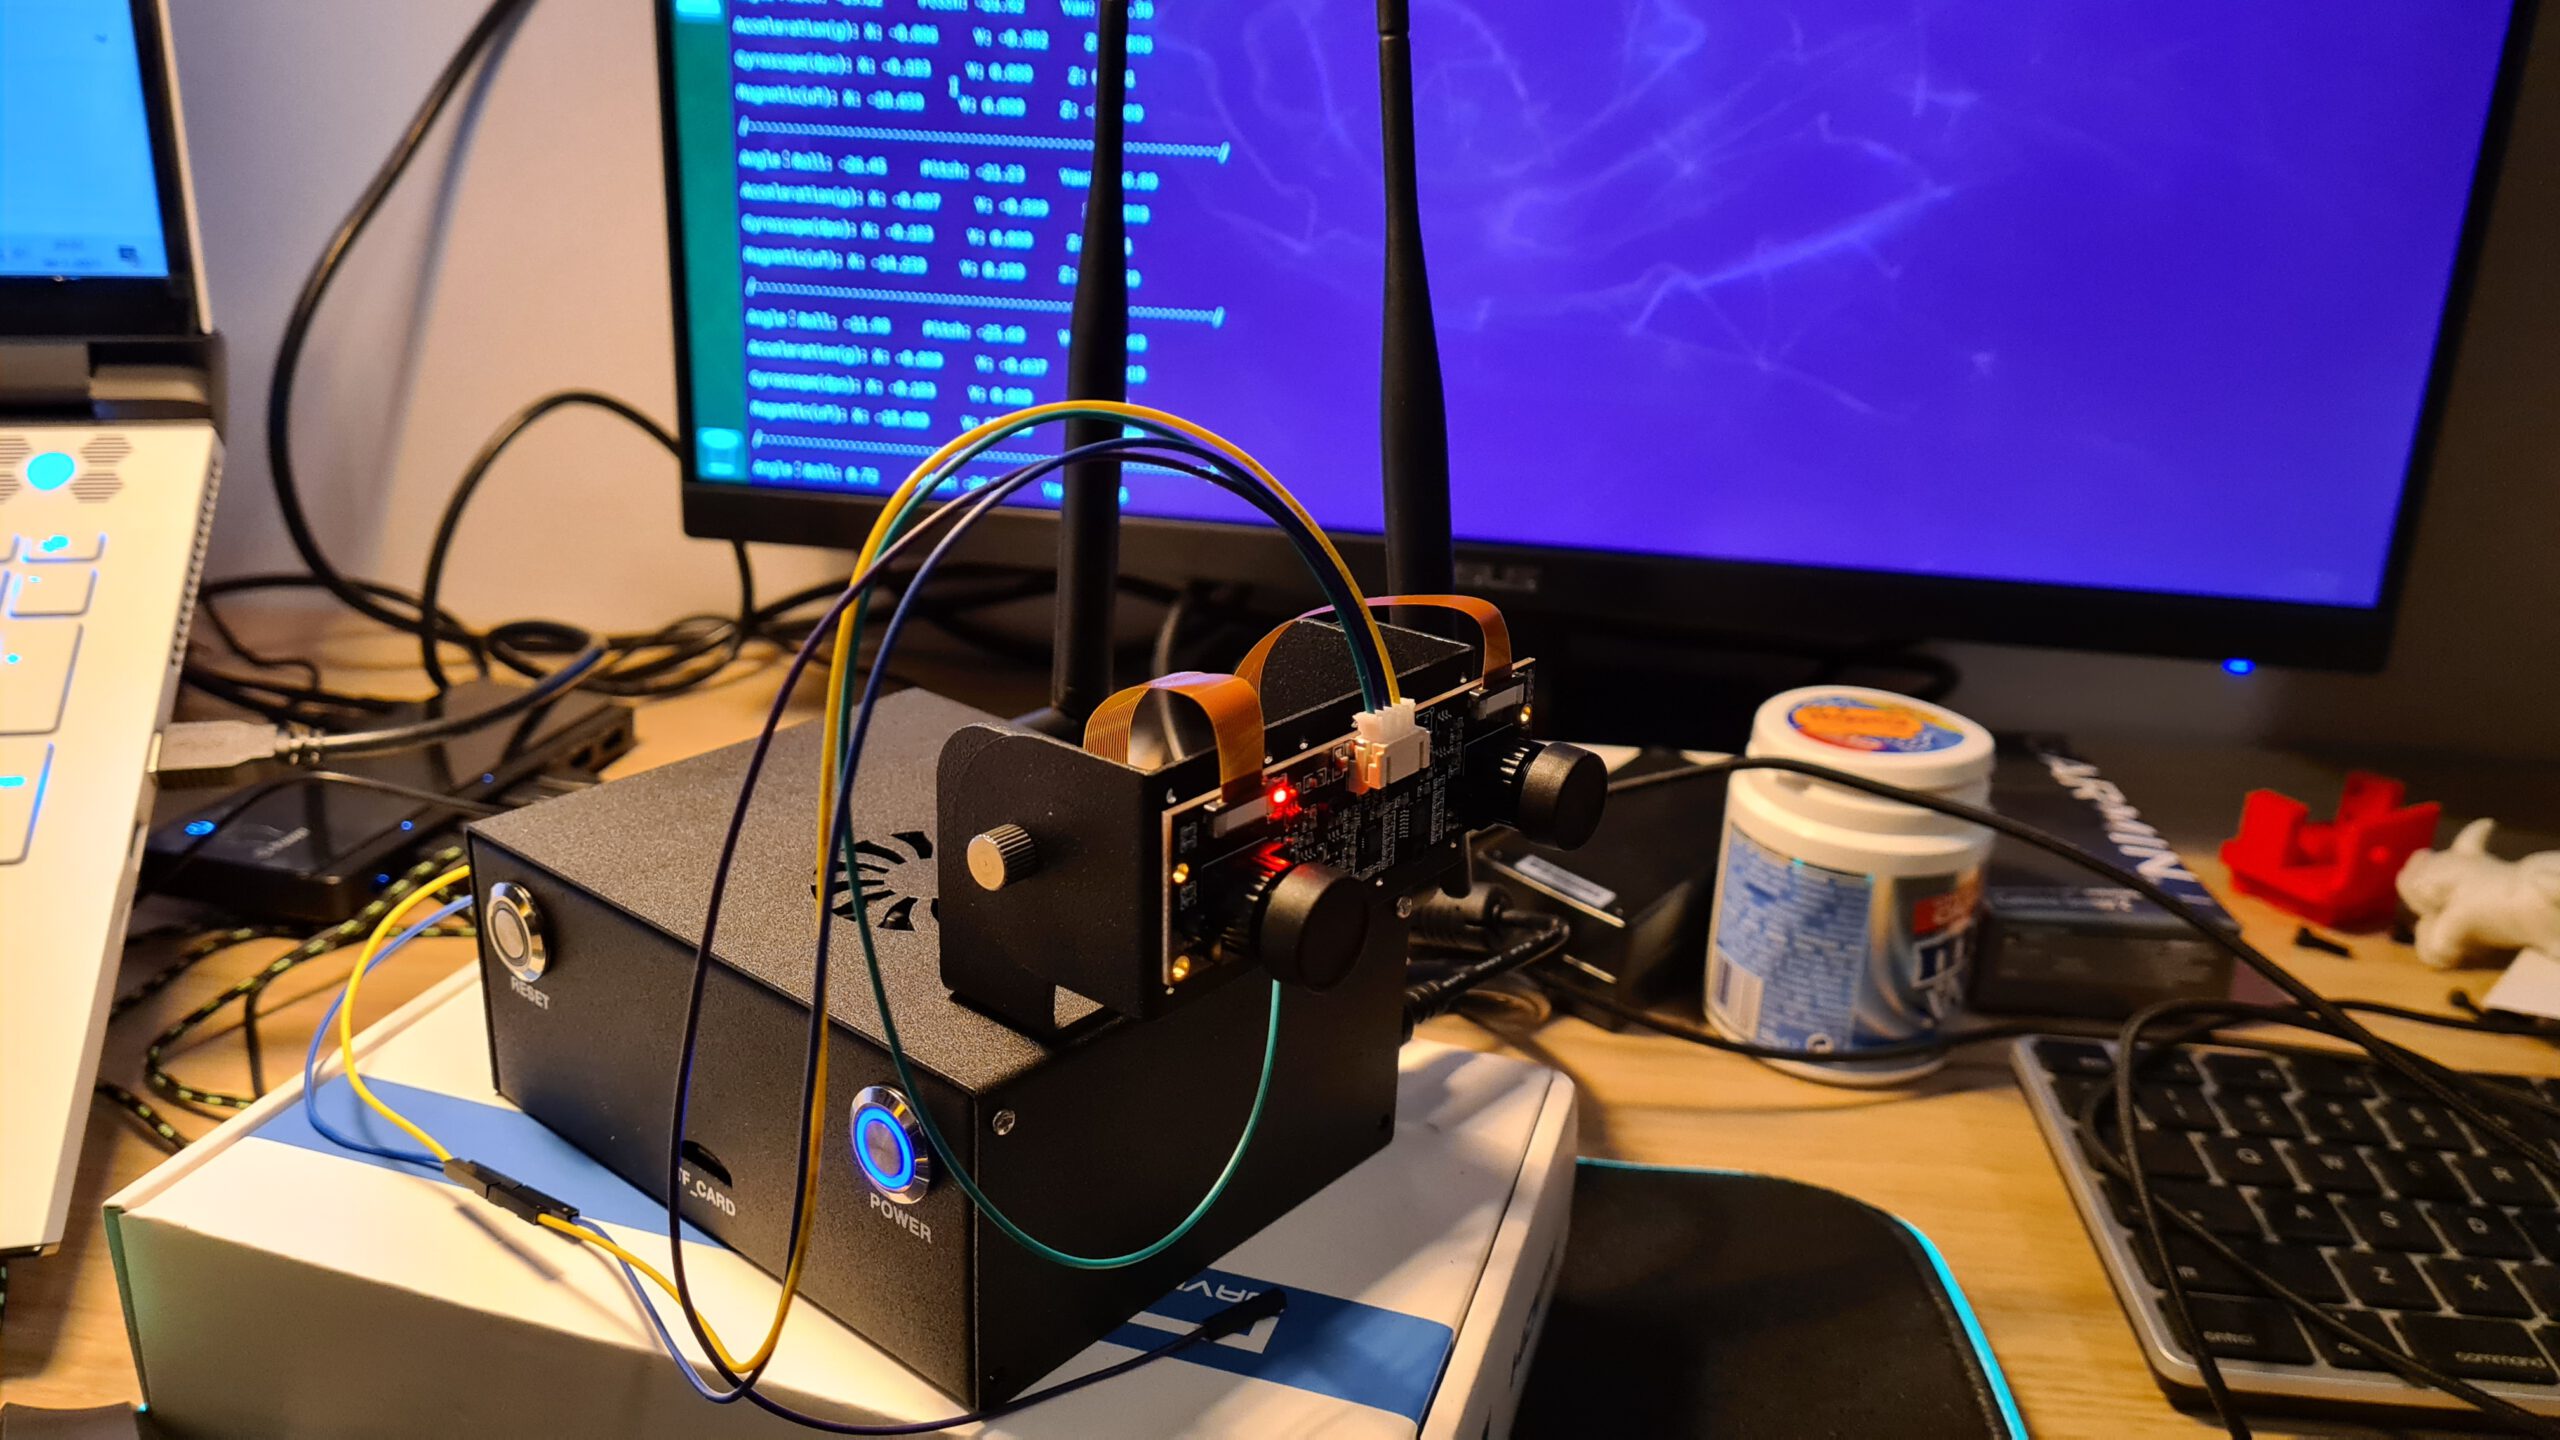
Jetson Nano Developers Kit B01 in a Metal Case
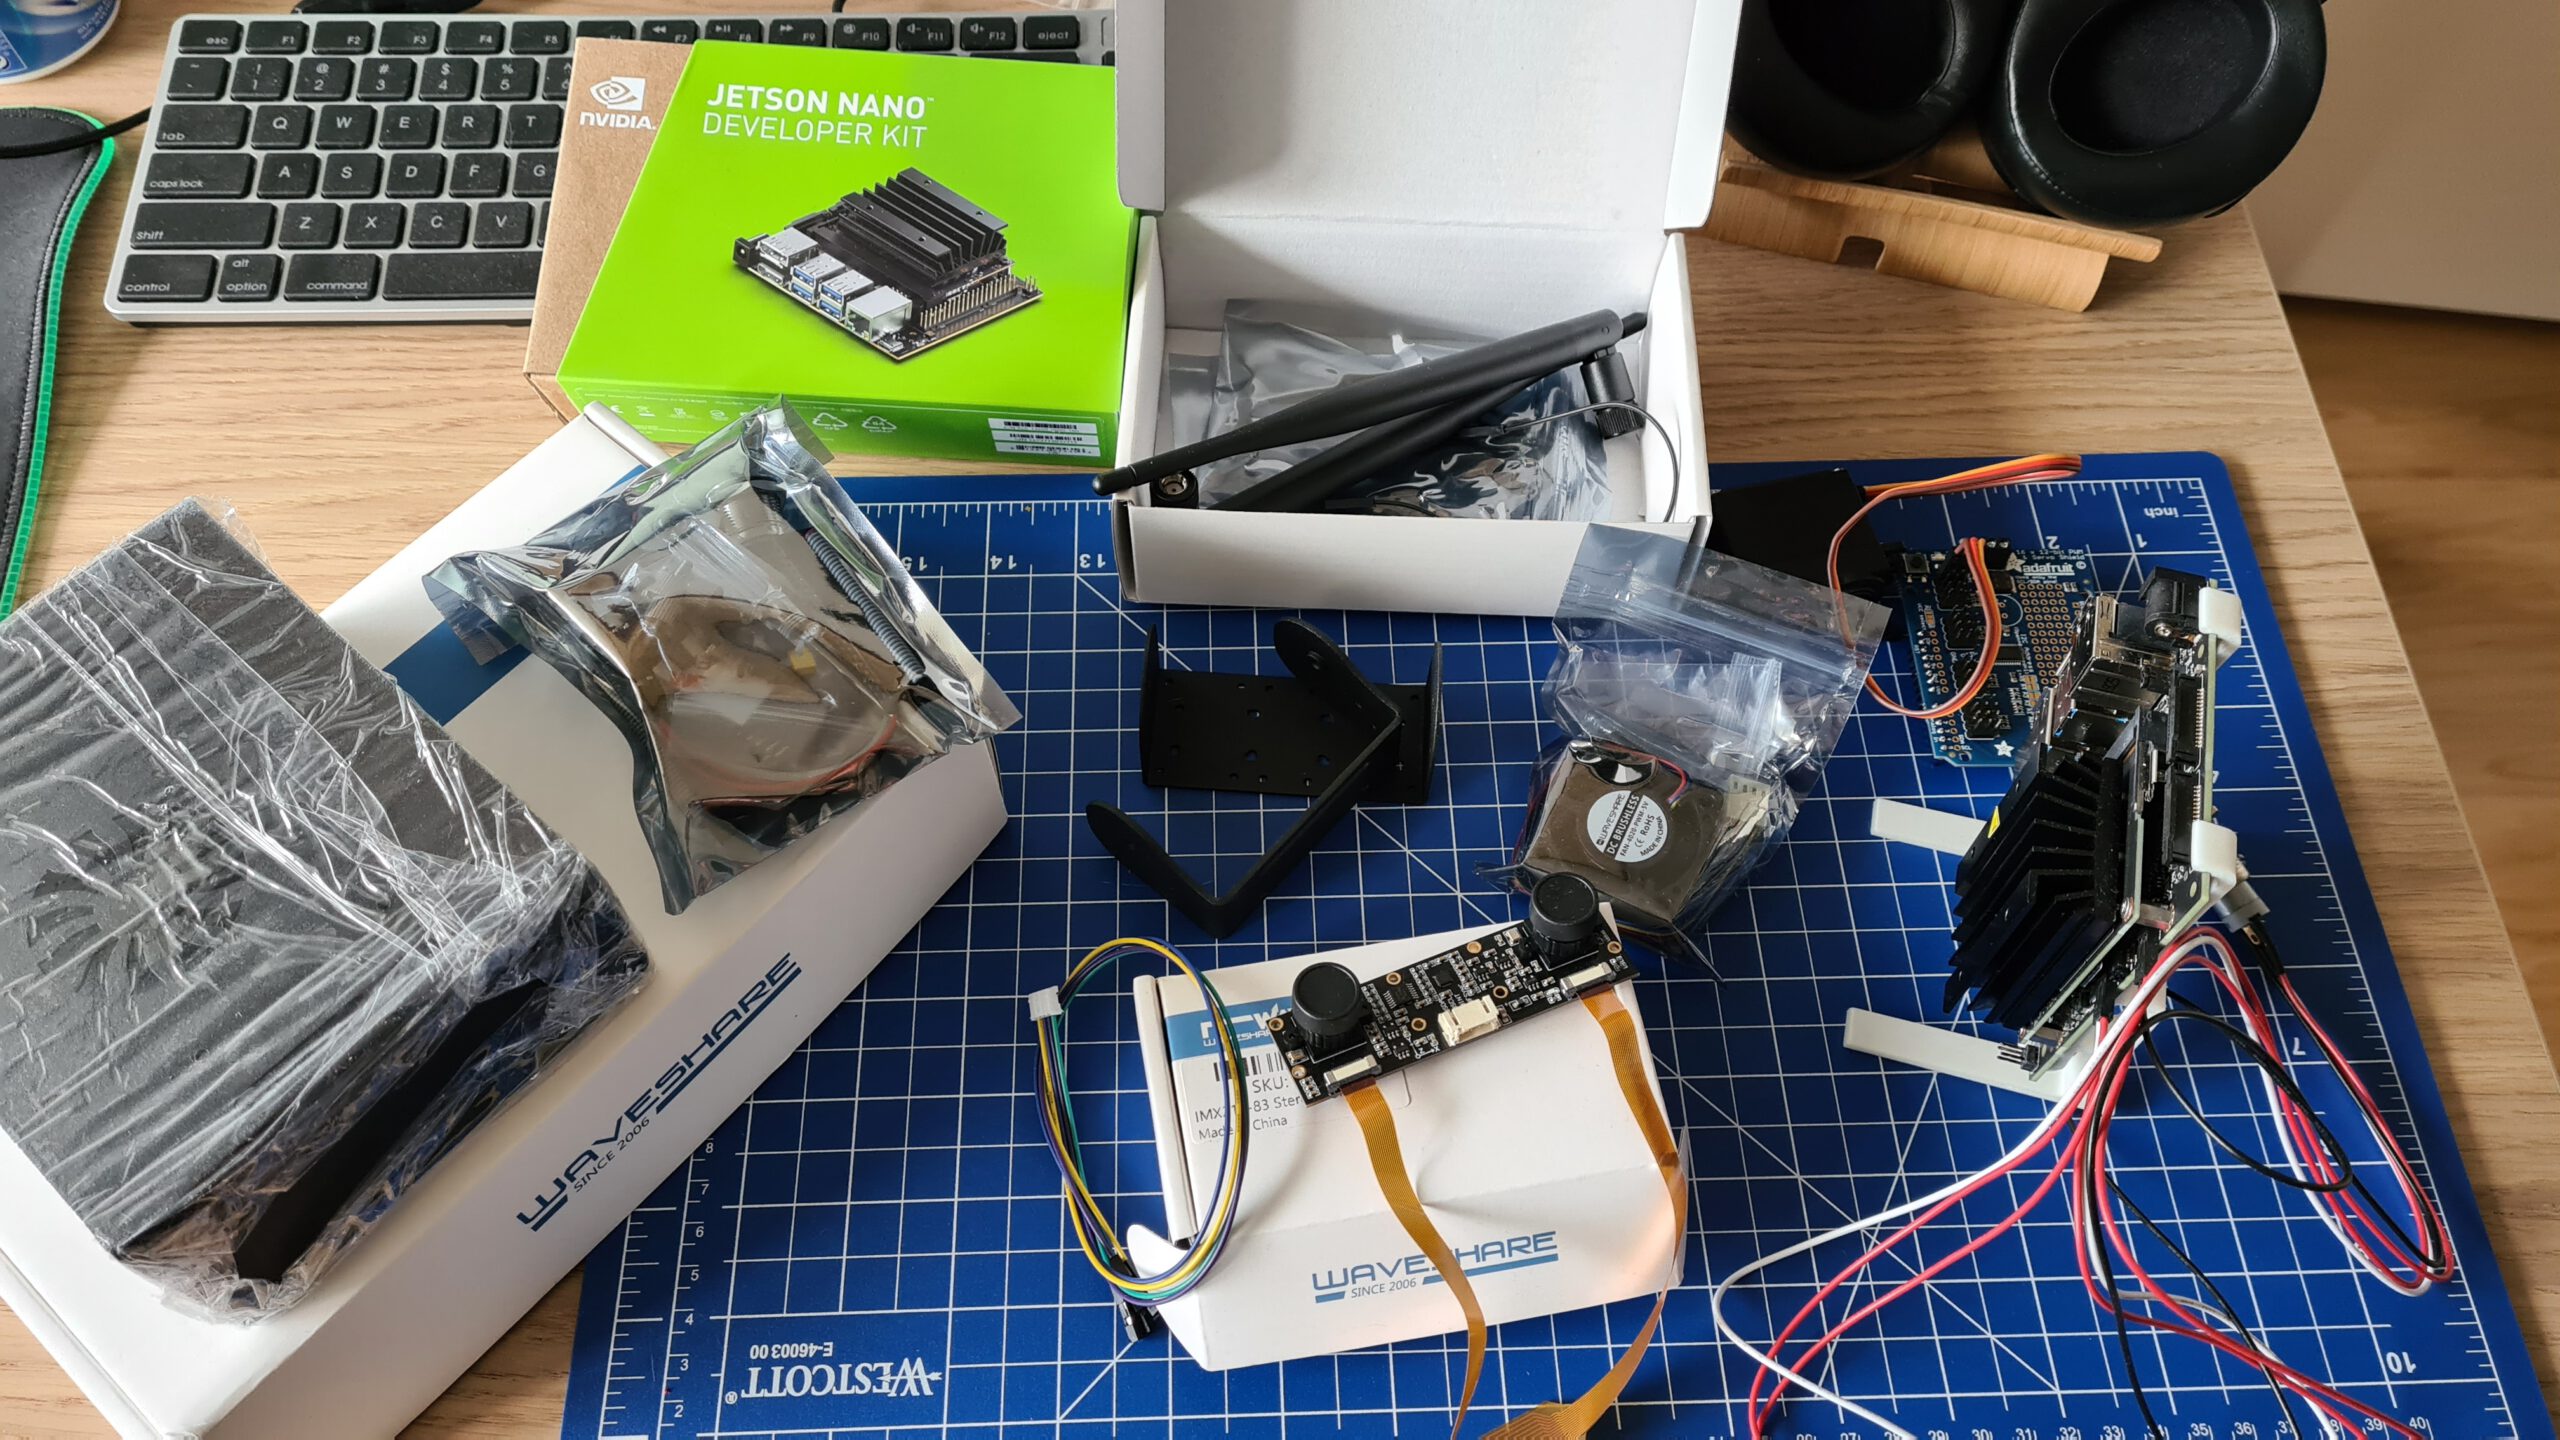
Recently I bought a Nvida Jetson Nano Metal case which also had a camera mount for the stereo camera. I opened up the boxes of the fan, network adapter, camera and metal case to check the contents if it’s all there.
The item list with links to the webstore where I bought them:
- The metal case: https://www.kiwi-electronics.nl/jetson-nano-metal-case-with-camera-stand
- The Nvidia Jetson Nano Developer Kit B01: https://www.kiwi-electronics.nl/nvidia-jetson-nano-b01
- The fan on top of the Nvidia Jetson: https://www.kiwi-electronics.nl/ventilator-40x40x20mm-voor-jetson-nano
- The wireless NIC: https://www.kiwi-electronics.nl/ac8265-wireless-nic-for-jetson-nano
- The stereo camera: https://www.kiwi-electronics.nl/8mp-stereo-camera-for-jetson-nano
- The power adapter: https://www.kiwi-electronics.nl/mean-well-psu-5v-4a
- A micro sd card of 64GB which I bought in a Action store.
As for the micro-sd card I flashed it with the Nvidia available image which I downloaded here: https://developer.nvidia.com/jetson-nano-sd-card-image. I flashed it on my windows laptop with the application Balena Etcher.
I didn’t found a assembly guide so I thought it was kind of self explanatory, however I soon faced the jumpers and connections of the buttons and camera. So I went to my helpful friend: Google!
I see some differences between Nvidia Jetson boards, but also metal cases which were older or just different. They only had one thing in common: their name. They’ve all been named “Metal case black” and some specify that’s for the Jetson Nano. Not the best specifications but I managed to get a lot of information.
- The User Guide for the Jetson Nano Developer Kit B01 (4GB) can be found here: Jetson Nano Developer Kit User Guide.
– Don’t forget to look at jumper 48 (J48) if you want to power the board from a barrel jack instead of the USB-C option. - An assembly video which matched exactly with my configuration: https://www.youtube.com/watch?v=GSTNnvdVtrI .
– There’s one thing wrong in the video and that’s the reset button pins, they switched red and black in the video! Other than that, I think it’s a pretty helpful video. - An article which gives more information about the difference of the pins and stuff between the Jetson boards: https://geekworm.com/collections/new-arrivals/products/geekworm-nvidia-jetson-nano-metal-case-with-power-reset-control-switch .
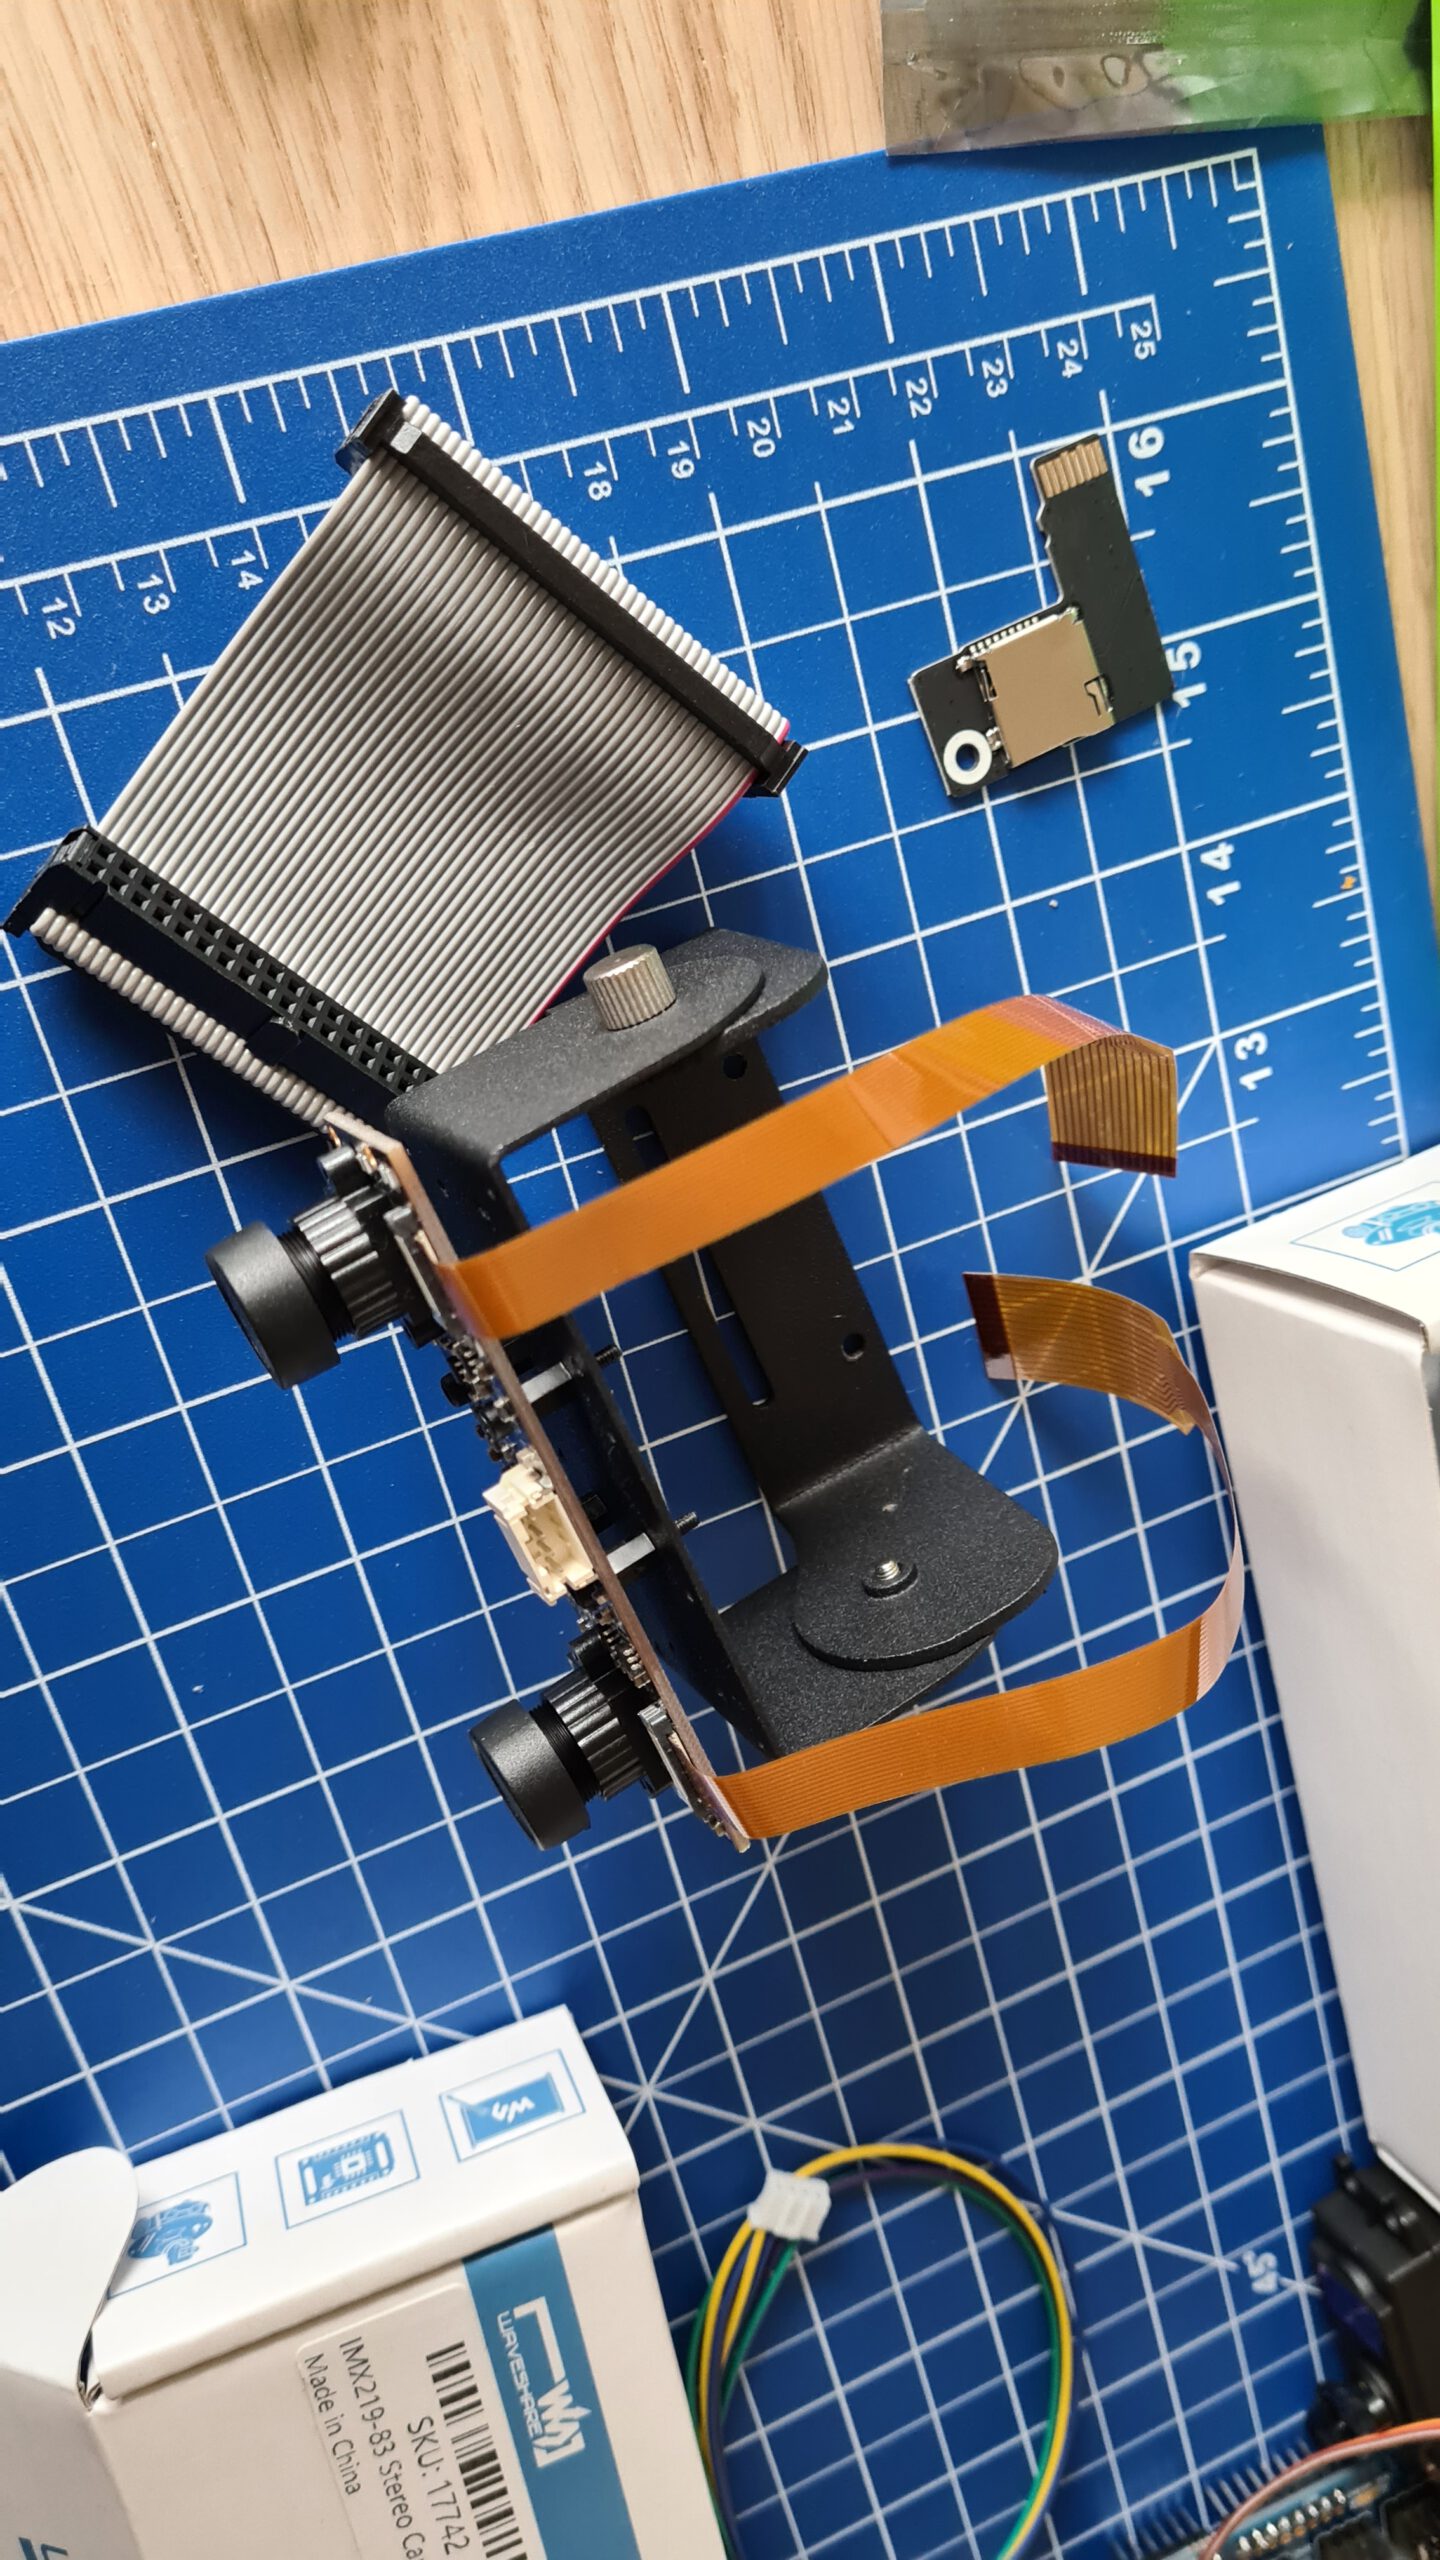
The IMX219-83 binocular camera with depth vision
A small thing I encountered was with the binocular camera, IMX219-83 Stereo Camera 8MP. I can’t find much about the pins of the white connection plug which I think will lead me to the sensor data which it can measure. A few handy links about this dual camera which provide some more details: https://www.waveshare.com/product/ai/cameras/binocular-cameras/imx219-83-stereo-camera.htm and https://www.waveshare.com/wiki/IMX219-83_Stereo_Camera .
In the assembly video and images of the Nvidia Jetson Nano Developer Kit B01 assembled with the metal case, there is no trace where the cable needs to go which is delivered with the camera. Only the obvious CSI cables of the camera’s are shown. And the female white pin is not connected.
In the details of the camera the following sensor is available on the stereo camera, a ICM20948 which is a 9 DOF sensor. And on the website of robotshop.com there is a datasheet and schematic of this measurement unit available, https://www.robotshop.com/nl/en/sparkfun-icm-20948-9dof-imu-breakout-qwiic.html.
Eventually I found out that I only need two cables to connect, the SDA and SCL to pins 3 and 5 of the Jetson Nano board. I found out by reading it on the product page of elecrow, https://www.elecrow.com/wiki/index.php?title=IMX219-83_Stereo_Camera . And to be sure I’ve looked any further into the GPIO pins and found a nice image about it here, https://maker.pro/nvidia-jetson/tutorial/how-to-use-gpio-pins-on-jetson-nano-developer-kit.
After that I ran a demo application which can be downloaded on the following page lower on the page, https://www.waveshare.com/wiki/IMX219-83_Stereo_Camera. After I ran the demo which first wasn’t connected so it’s response was NULL and a lot of zero’s. After i connected it, it mentioned: Motion-sensor is ICM-20948. And a lot of values which changed the moment I picked the metal case up and changed the angle.
So that did it for me concerning the camera and it’s sensor data.
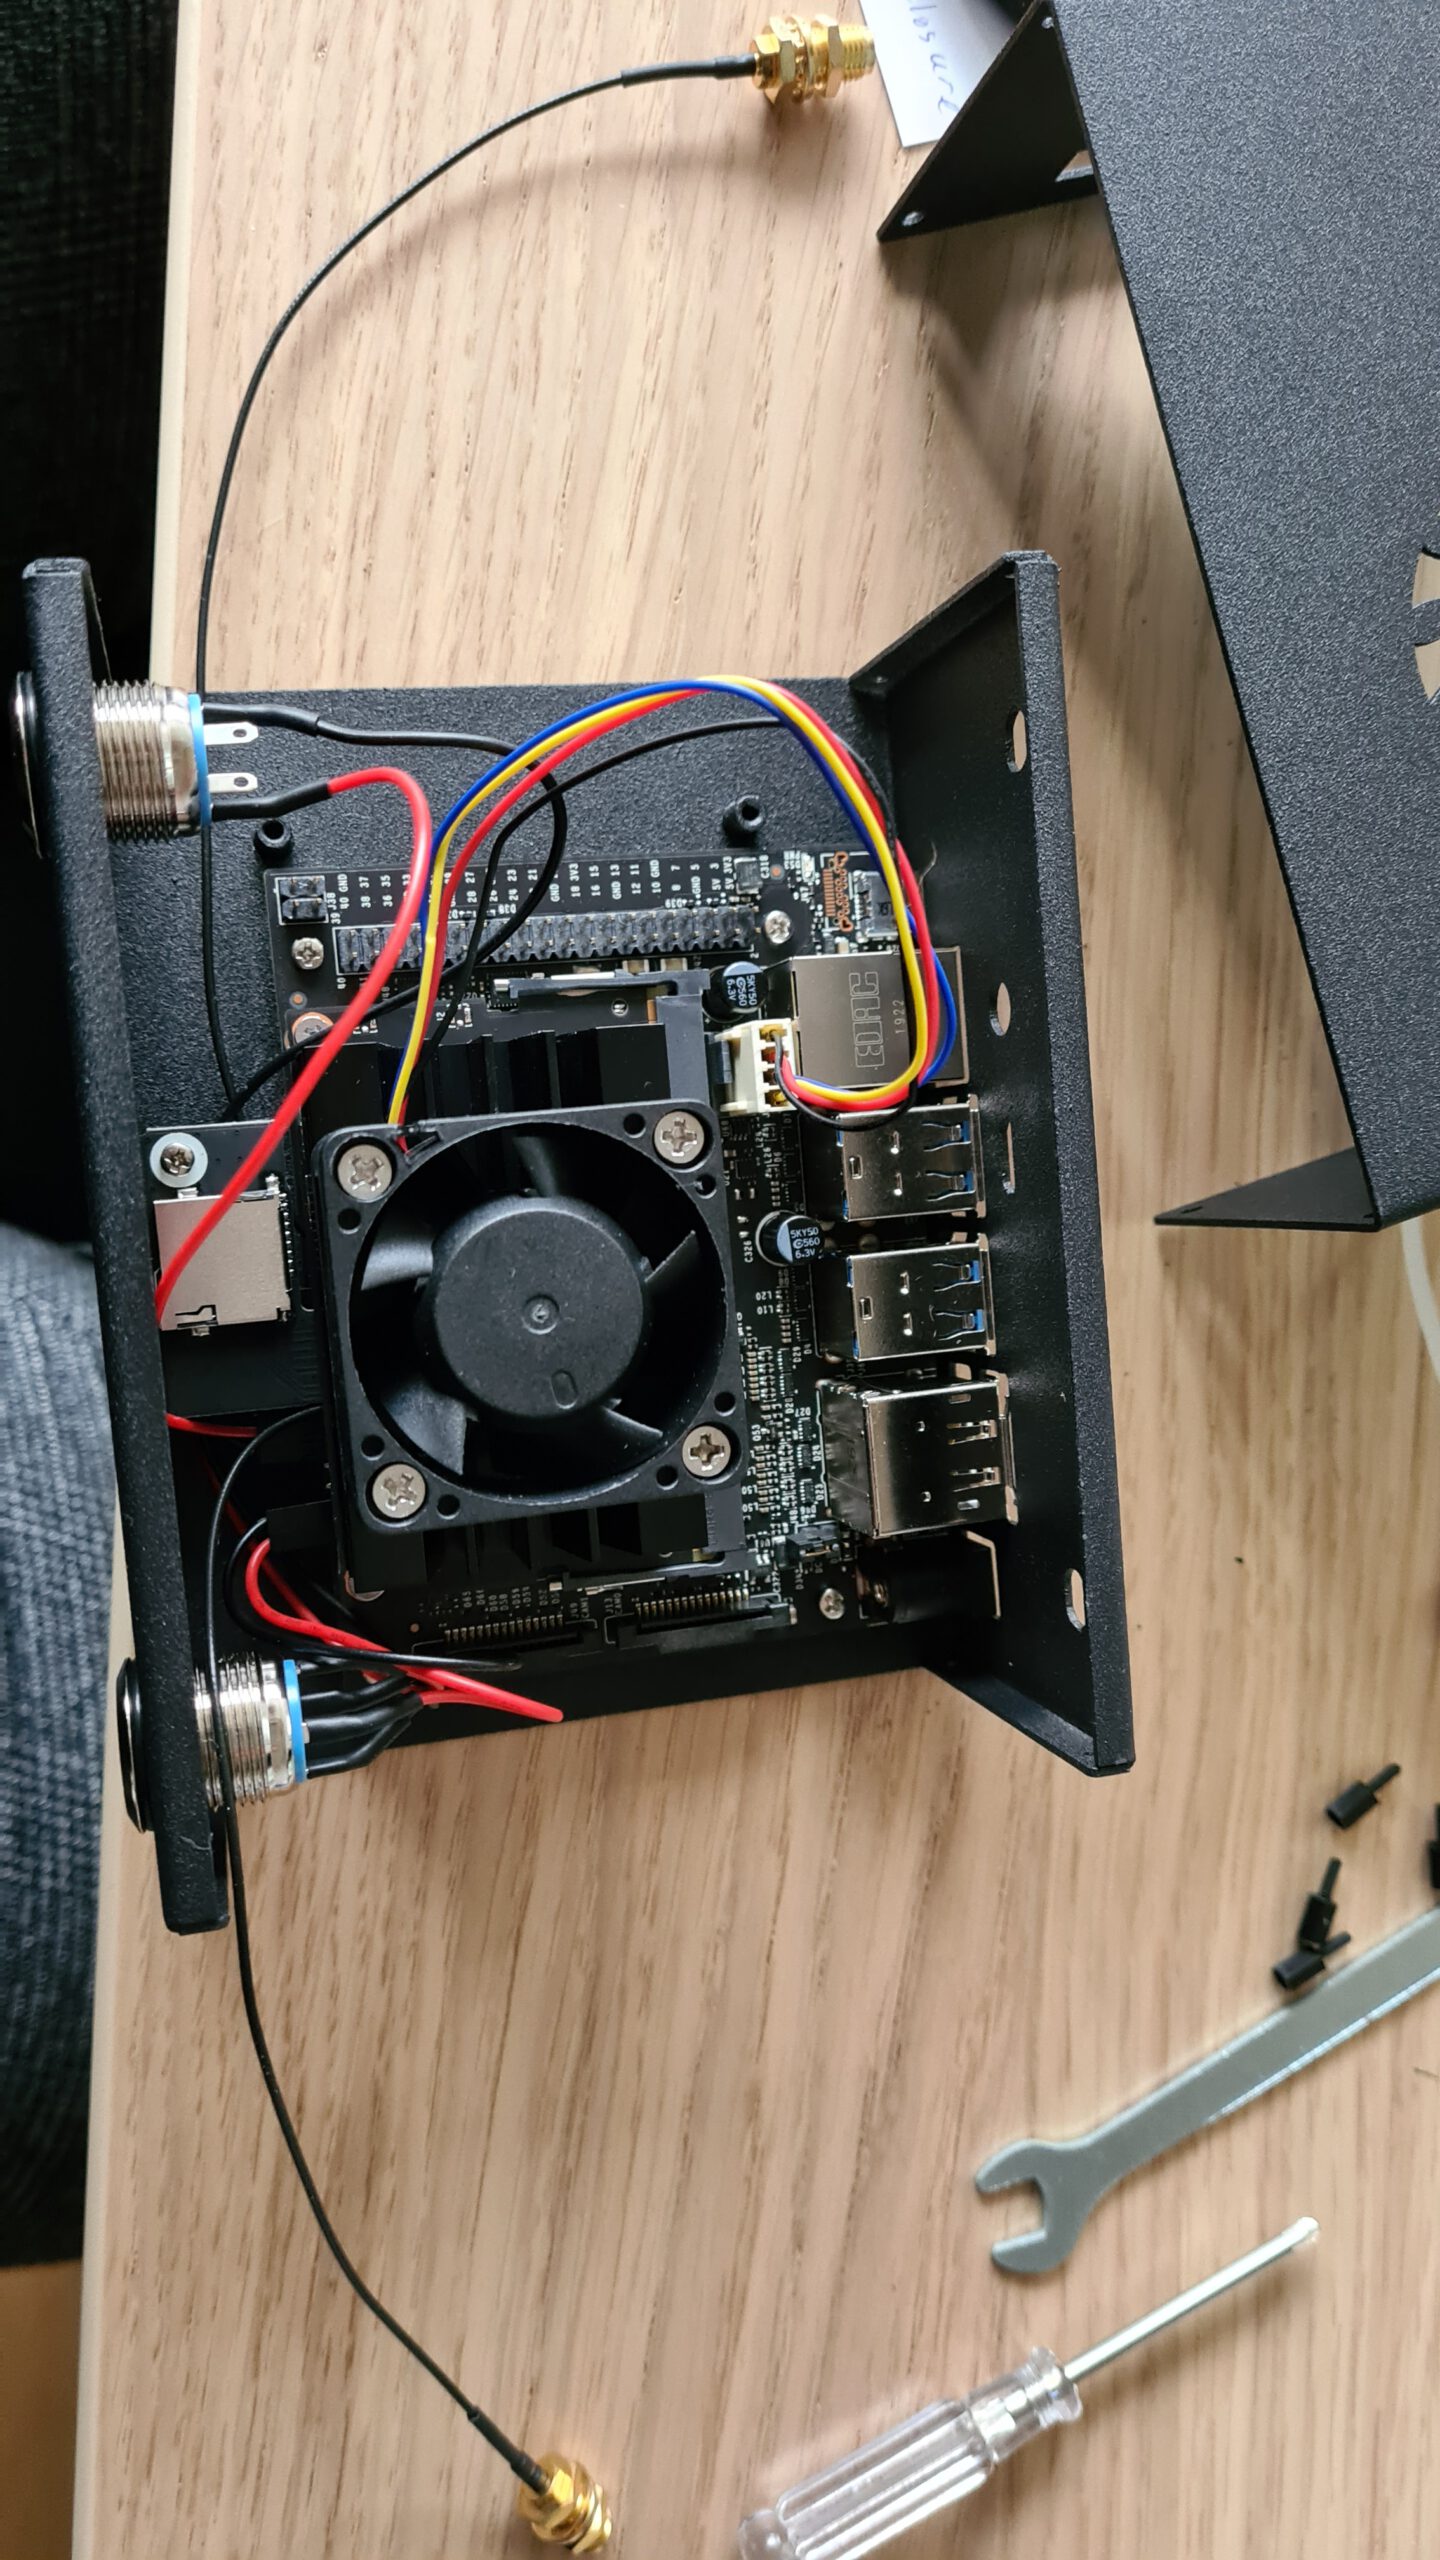
PWM 40x40x20mm fan
The fan which I connected was also concerning me, I read about it on forums that it will work based on the thermal readings. But I needed to know for sure. Can’t have assumption based on thinking you’ve got cooling or knowing.
That’s when I’ve found out what to do, the following commands will help you out.
This command will show you the current setting of the fan and some other fancy information.
sudo jetson_clocks --show
When your fan isn’t running the fan is probably set to zero. This is consistent with the behaviour. So let’s turn it at maximum!
sudo sh -c 'echo 255 > /sys/devices/pwm-fan/target_pwm'
When the fan was running, I was relieved and now I know it’s working.
To turn it off again run the following command to set it to zero again:
sudo sh -c 'echo 0 > /sys/devices/pwm-fan/target_pwm'
That was the last thing I needed to check, now you know how to setup the Jetson Nano with additional devices in a metal case. My own goal is to use the Jetson Nano for personal projects with the Robot Operating System. I’m hoping that the encounters I’ve solved will help you out and leave you with a system ready for your next project!